-

-

-

-

- S1: Sequence 1
- S2: Sequence 2
- S3: Sequence 3
- F1
- F2
- F3
- F4
- F5
- F6
- F7
- F8
- F9
- F10
|
|
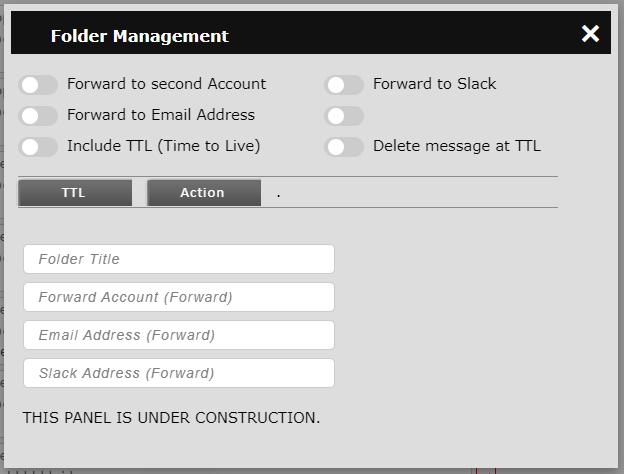
Under Construction
| Operation | Description |
|---|---|
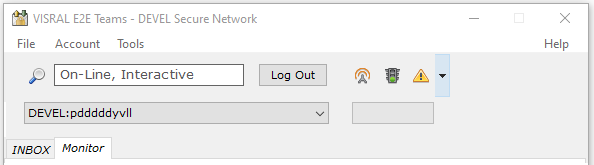
| Login | Select the account from the dropdown. Enter the Master Password followed by a carriage return or click Login. Subsequent execution of the App will display the previously active account in the dropdown. |
 |
Select account:
If already logged in when selected, the account will change to the new one. The selection on the dashboard will also reflect the change. |
| Logout | Enter standby (Control Panel remains open):
|
 |
Close the application:
|
| Icon | Operation |
|---|---|
 |
Show password. |
| Run online/offline. | |
  |
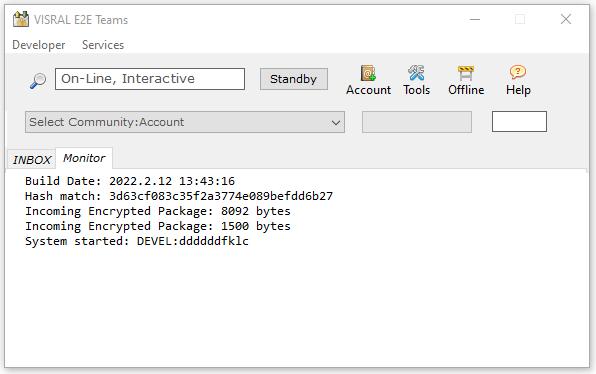
Pulsing green - OK Solid red - not ready |
 |
Notification Control. |
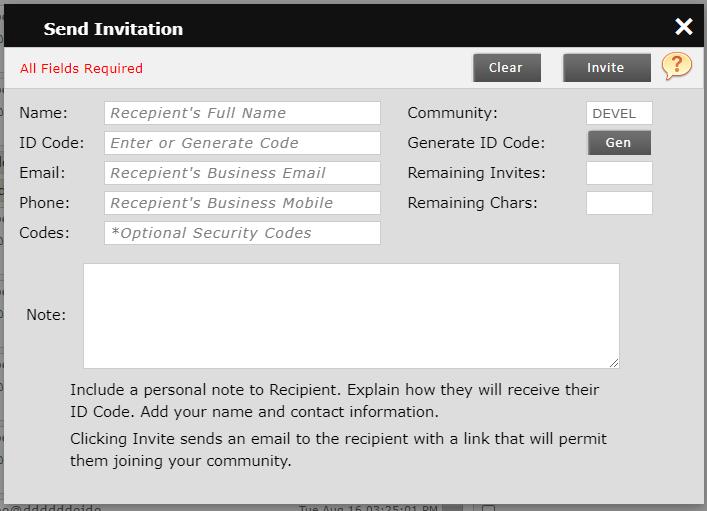
Click the invite icon on the left side of the toolbar to bring up the invitation panel. (App and agent will be used interchangeably in this document.)

Fill out the form with the recipients info and click the Invite button at the upper right of the panel. At that point an invitation email offering the ability to join the current community will be sent to the addressee with a clickable link.
The Codes entry is used to assign special privileges and monitoring tasks such as the detection of foreign media.
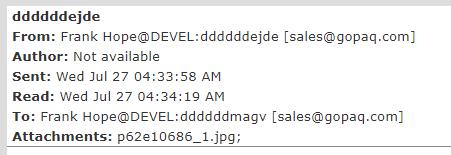
The recipient will receive the following email in plain text.
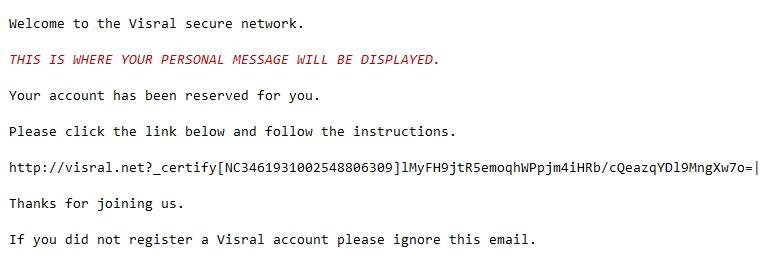
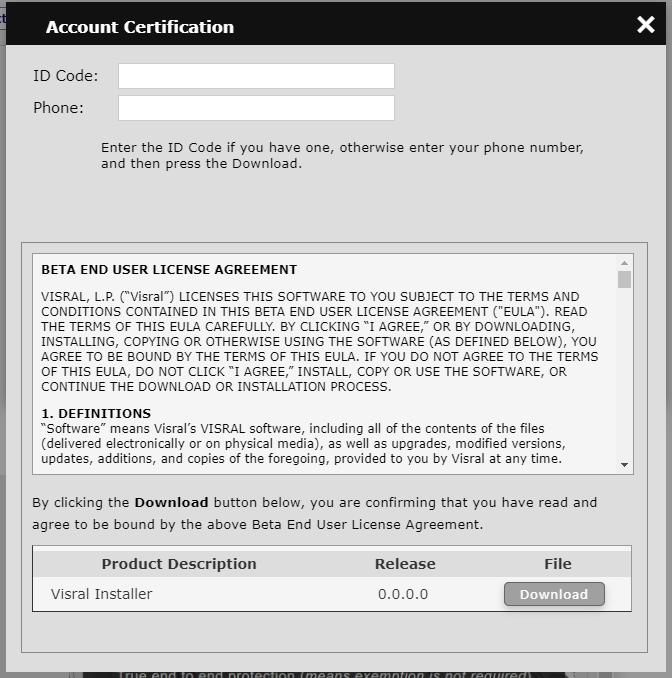
After clicking the link, the recipient's default browser will display the following panel. The recipient needs to enter the ID Code if they have one, otherwise their phone number, and then press the Download. They will receive a customized Agent specifically assigned to them.
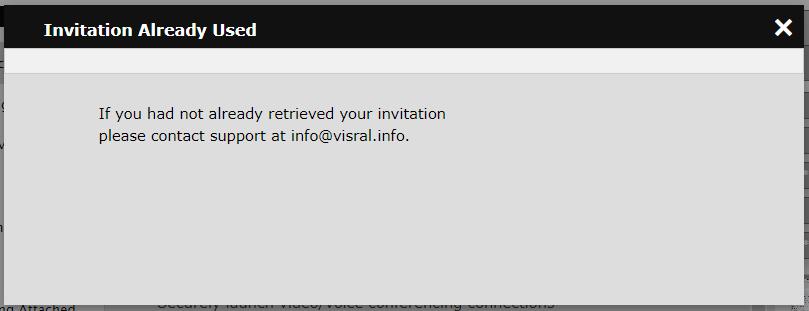
Should there be an attempt to use the invitation by an unauthorized party, the following will be displayed. Of course the invitation is useless without the ID Code.
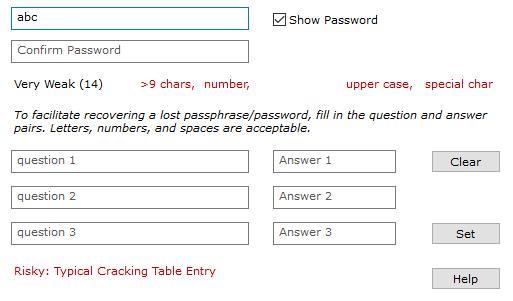
Dynamic assistance will be displayed to help in choosing a safe password. It will warn you if selecting a weak password, but will not prevent you from using it. It is pretty much overkill as this password never leaves the agent.
The password created is used to unlock 256 bit randomly generated passwords that in turn are used to sign into accounts. In fact the Master Password utilizes the bcrypt algorithm to protect it from attempted access by malware that winds-up on the local machine.
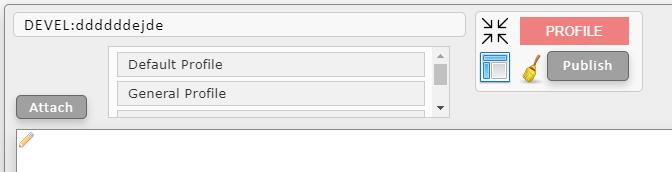
After creating a password the agent panel will become visible.

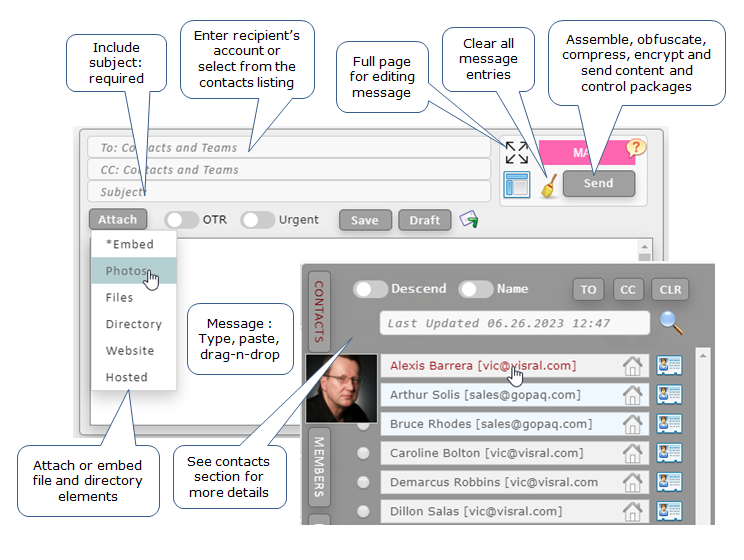
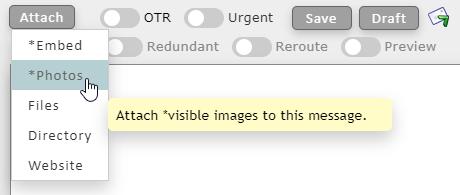
Over and above attachments (photos, files, directories, websites/pages, and hosted content), there are numerous way to create messages.
| Entry | Operation |
|---|---|
| *Embed | This entry brings up a file directory to select pictures from. Results are equivalent to drag and drop of images. These images can be repositioned by dragging. |
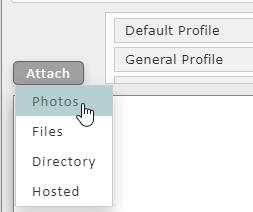
| Photos | This entry brings up a file directory to select pictures from, which will be added to the end of the message. Has some advantages in that it allows enlarging the images and then stepping through them. |
| Files | This entry brings up a file directory to select files from. If any files, directories, or photos are attached to the message the folder icon will be displayed at the recipient's end.  |
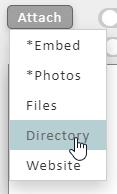
| Directory | This entry brings up a custom directory of directories; i.e. only directories are Viewable and selectable. |
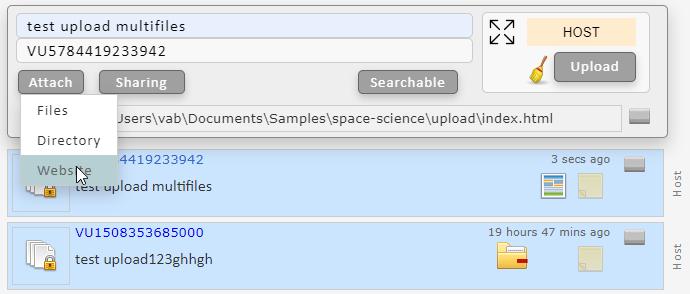
| Website | This entry brings up a file directory to select a HTML index file from. All associated HTML pages associated with index, as well as the CSS and JS files will be combined together and processed to create a shippable encrypted website. Some filtering is performed to remove dangerous code, and all links to external locations are intercepted to provide the user various options when run. (The same task is performed again at the recipients end to protect against possible rogue insider.) |
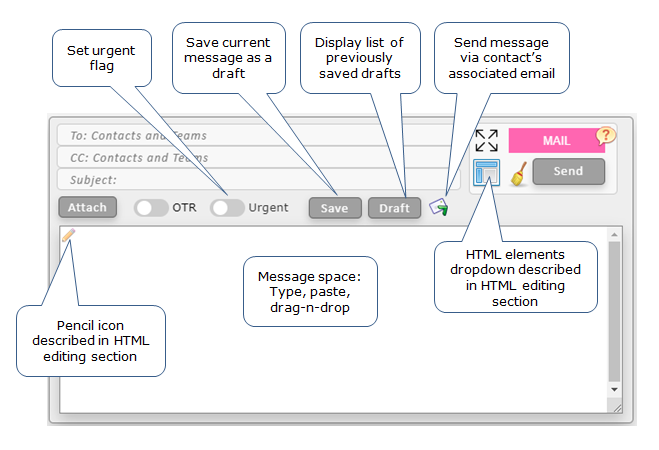
| Save | This operation save the current message under development as a draft. |
| Draft | Clicking this entry will display all saved draft messages. |
| Urgent | Setting this slider will cause the recipient of the message to have a red flag displayed.  |
| OTR | The Off-The-Record slider will cause the AES key used to encrypt the message content to be encrypted with an RSA public key belonging to the recipient of the messages; i.e. only the recipient can read the message. |
| Redundant | This slider causes the message to travel two completely different paths to the recipient. The only locations of potential failure are the endpoints(agents). To further enhance message integrity, messages can be automatically compared when received. |
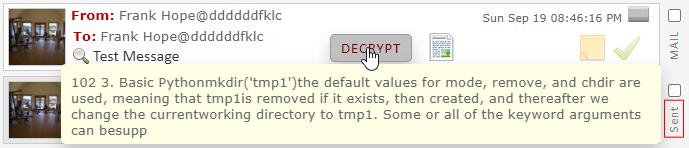
| Preview | This slider indicates whether or not a small portion of content will be visible without decryption. |
| Tron | This slider indicates this is a system level message used for monitoring the network. (It is only available to those with the proper level of privilege.) |
 |
Clicking this icon will send the message via legacy email. The address on the TO: line must be a valid email address. Only a single address will be accepted at a time. |
 |
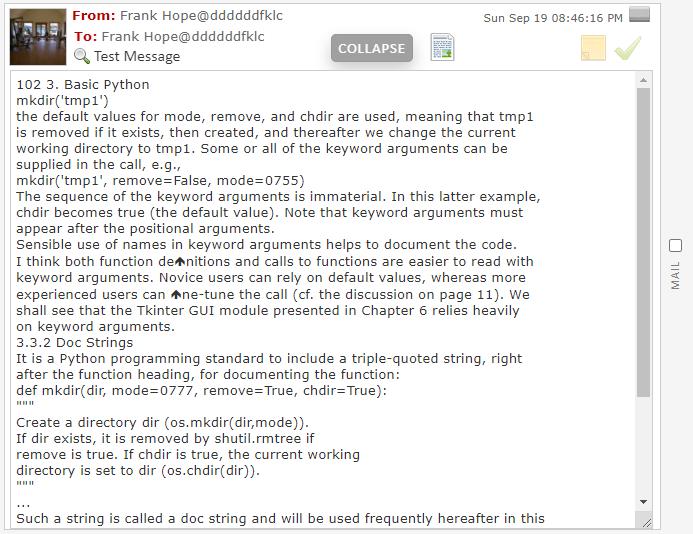
The icon toggles the size of the dialog messages space. |
 |
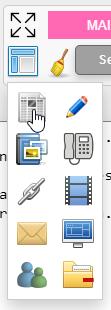
Passing over this icon will expose HTML components that can be dragged into the messages. See below. |
| Pressing this icon will clear the dialog to its default condition. |
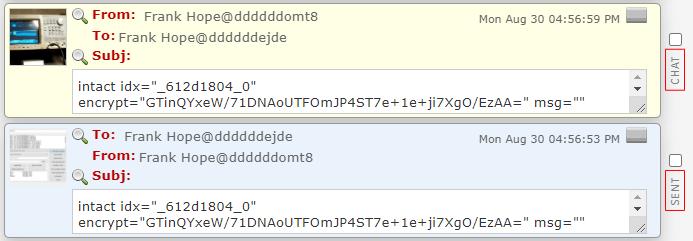
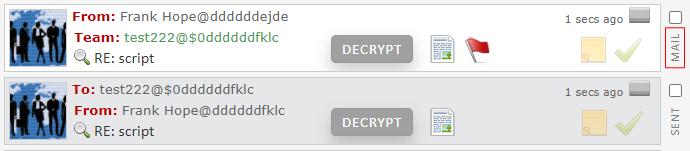
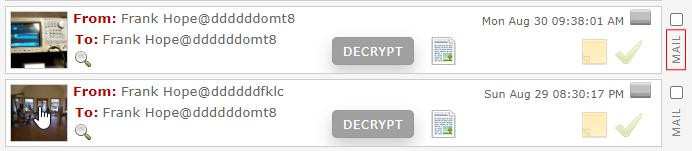
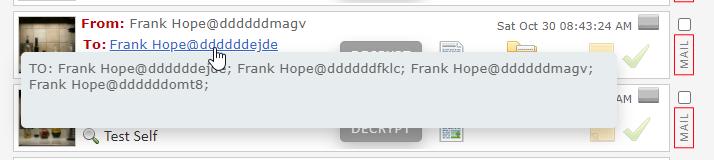
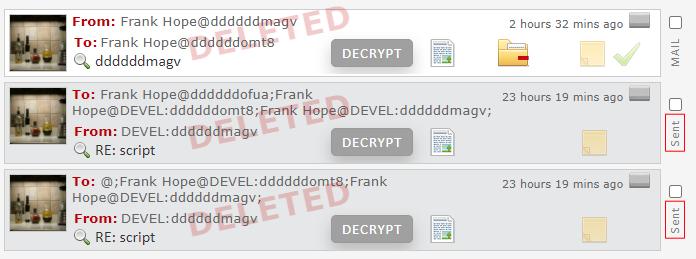
There is an indication on the sent message as to when the recipient has accessed it. The green bar to the left of the sent message indicates it was read by the recipient.
This acknowledgment does not apply to team messages, and only in response to access by the primary recipient; i.e. not to others on the TO or CC list.

The full display of the sent message before the recipient read it.
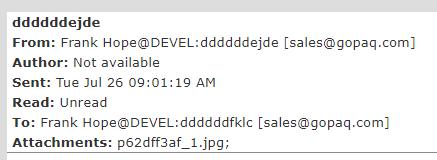
The full display of the sent message shows the time it was read.
Signaled if a message intended strictly for a team has been forwarded outside the for-eyes-only group. (Not available in current release.)
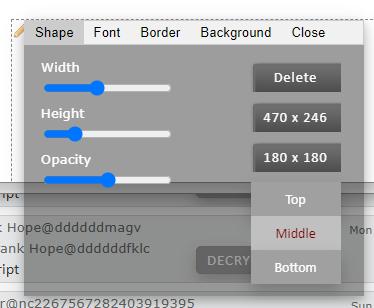
This illustrates the ability the add and edit various HTML elements to messages, including dragged images. each element dropped has an outline with a small image in the upper left hand corner, both of which are not visible on the sent message. (The image and outline can just be seen below the editing popup. A click of the right mouse button when the cursor is over the image will cause the menu to appear. Holding down the left mouse button when over the image will allow the element to be dragged to a different location.)
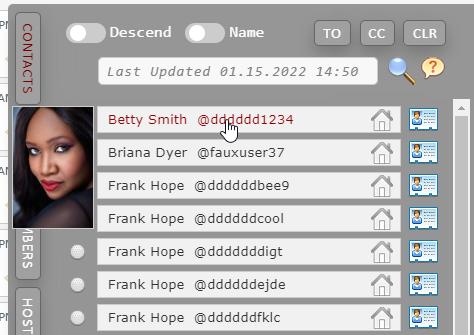
The Contacts listing can be displayed by either clicking on the CONTACTS button on the right or by clicking on the TO or CC line of the mail dialog menu.
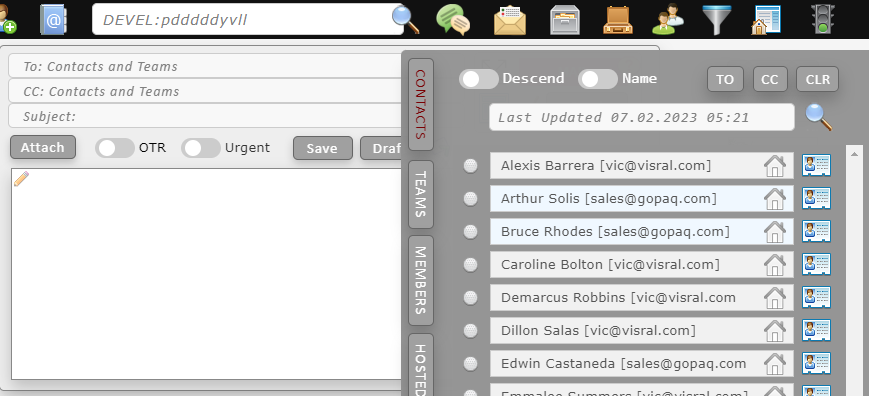
This is a snapshot of the Contacts slide-out. Clicking on an entry will insert the address into the TO: line of the Mail/Chat dialog menu. When the cursor passes over each entry, the associated portrait will appear if it is available.
| Entry | Definition |
|---|---|
| TO | Clicking this button after selecting entries will insert the selected into the TO: line. To select an entry, click on the ball icon  which will toggle to which will toggle to  and back. and back. |
| CC | Clicking this button after selecting entries will insert the selected into the CC: line. |
| CLR | Clicking this button will clear all selected entries. |
 |
Find contacts matching specified criteria. Partial match will be performed against names, communities, and accounts; listing all that succeed. |
 |
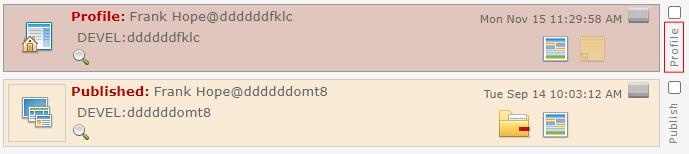
Download and display profile associated with this account. (Displayed in separate browser tab.)
|
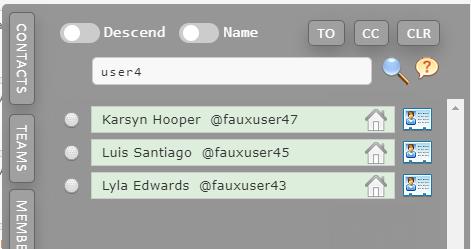
Entering a key word in the search bar and clicking the magnifying glass icon will list entries where the word or expression is found. (Case insensitive matching.) The results of the search will be displayed with a green background.
The date showing in the search bar indicates the most recent accounts ledger. Each community will normally have a different account ledger. (May not be true for sub-communities.) The team members of account ledgers are encrypted and only accessible by members of the particular team.
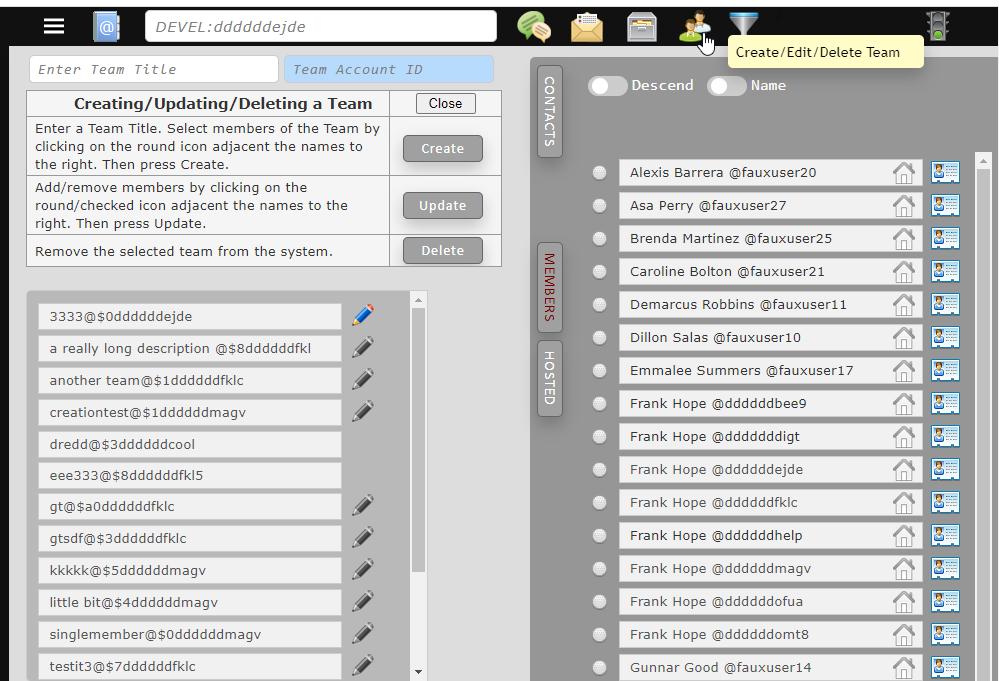
The TEAMS listing displays all teams within the current community the user is a member of. Only teams created by the user can be edited or deleted. (Teams the user is not a member of, can not be seen.)
The MEMBERS listing displays all members of the team selected from the teams listing. (Members of teams the user is not a member of, can not be seen.)
The HOSTED listing displays all hosted packages within the current community belonging to the user.
Consumer Variant: results of global search of public communities and sub-communities.
Consumer Variant: local editable database of contact info. The particular contact is selected by clicking on the rolodex icon at the right end of the entry. The existing information will automatically be loaded when the contact entry is selected. The Update button will reinsert it plus any changes.
Click the image below to display the contact details popup.
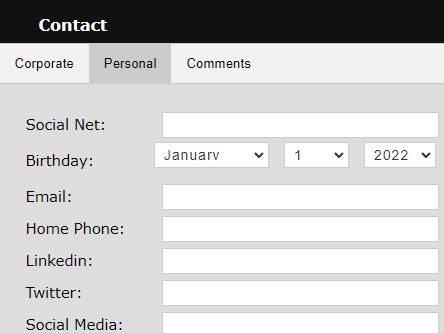
(Although beyond the scope of this presentation, the popup itself is editable and designed to dynamically generate DB interface routines as well as the DB file structure to hold the changed or added items. The contact DB file is encrypted when not logged in to the agent. )
Visral mail addressing can be broken down into three components:
Proper Name, Community, and Account.
EBNF syntax: [ProperName@][Community:]Account
Team syntax: $[<lower case alpha>]*<number><author's account>
| Component | Definition |
|---|---|
| ProperName | This is not used in routing, but rather provides a means to quickly identify the recipient. Also useful when a single account is shared by command and control applications, or multiple individuals. |
| Community | The community component serves several purposes. Like a ZIP Code it assists in message routing. It helps identify companies and their divisions. It allows assigning various features and rights to groups. Because accounts are unique, if missing the system will determine it. (Consumer variant: Communities also identify partner channels; i.e. those providing independent hosting, issuing memberships, and ...) |
| Account | Account names/number are unique throughout the system. They are case insensitive and can be up to 126 characters long. (Single thread time to locate a specific account out of 100 million entries is approx. 2 µsec on a software controller.) |
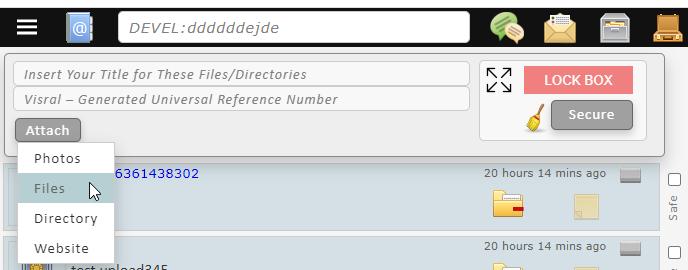
Select the Photos or Files entry from the dropdown and a file explorer will be presented from which to select one or more, files or images.
Photos over 100,000 bytes will automatically scale their resolution to fit within a 820x820 outline. (Result could actually be larger than 100,000 bytes.) To send larger full size images, attach them as files, which have no size restriction.
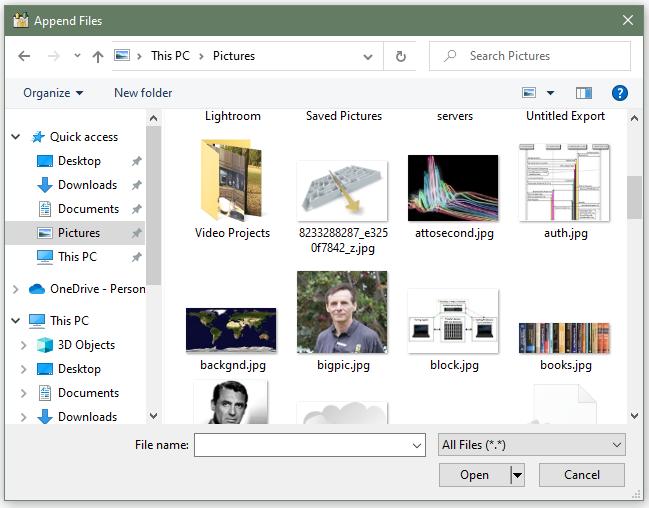
The difference between Embedded images and Photos is that photos are attached to the end of the message as in FaceBook fashion. On the other hand, embedded images are inserted into the messages and can be moved around and overlayed as in a word document, all be it in HTML.
Select the Directory entry from the dropdown and a custom directory explorer will be presented from which to select a directory to be attached. (Only one directory may be attached, however any number of directories may be included within that directory.)
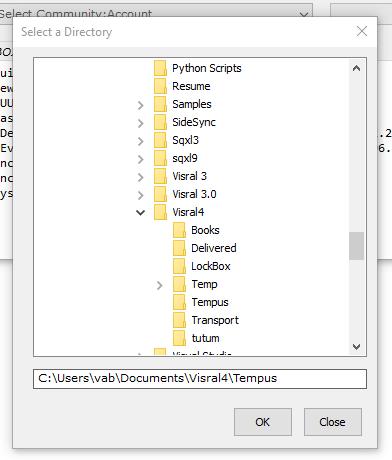
Following, the selection will appear in the attachment listing of the message. Before sending, the red X can be clicked to remove the entry. (The gray button at the right end is used in the processing of transported websites.)

Stress testing successfully transported a 250 Megabyte Python system directory containing 15 thousand files and subdirectories. As with all messages, the entire package was encrypted during transport, up to the time of display or reassignment.
Website generation involves a number of automated processing stages.
First select Website from the Attach dropdown.
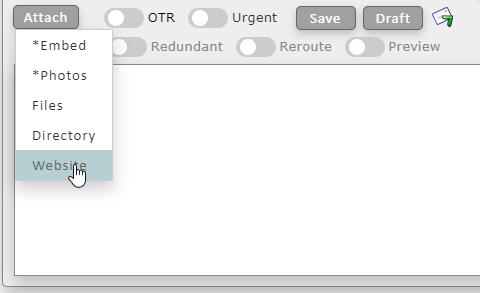
The file explorer will appear from which you will located the folder of the website to be attached. Now click on the index.html file of the site.
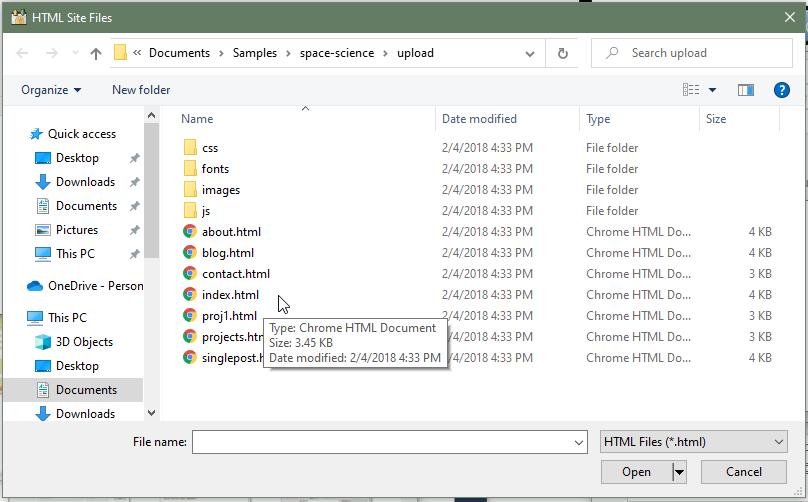
The location of the index.html file will be shown in the attachment listing.

To proceed with processing the site, click the gray button at the right side of the listed entry. The agent will automatically scan and process all files and subdirectories within the directory the index.html is located in. When processing is complete the resultant site will be displayed in a separate browser tab.

(The website process will insert and modify HTML and JavaScript code.)

The VU number is automatically generated by the Controller. This is to guarantee system uniqueness. The Title is required to allow user identification of the package.
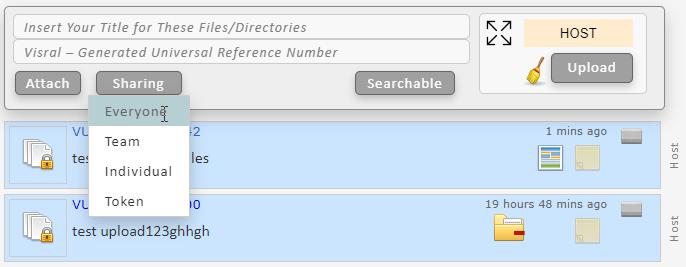
Sharing provides a means to limit access to hosted items.
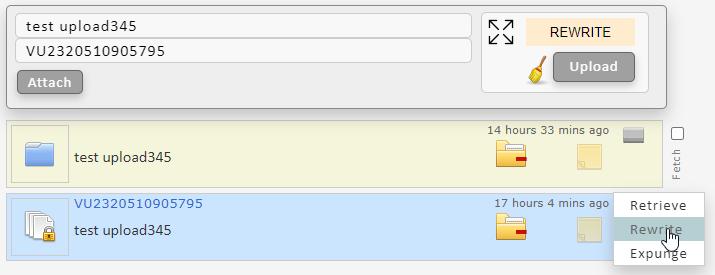
Updating the package. First click the Rewrite entry on the dropdown of the specific message to be updated. It will fill the dialog with the current information. Create a new message by attaching items. Press Upload when ready to update. Now anytime anyone accesses that package, they will receive the latest content.
The Retrieve entry will retrieve the hosted package from the transfer station. This is different from clicking the folder in that the folder downloads a temporary copy that is scrubbed when done examining.
The Expunge entry will remove the package from the transfer station, references from the controller, and any local references.


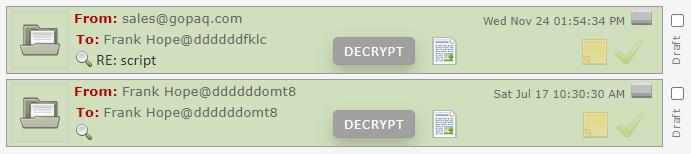
| Entry | Operation |
|---|---|
 |
The folder icon indicates attached files, directories, and/or images are available by clicking it. |
 |
The website icon indicates the message has an attached website and may be accessed by clicking it. |
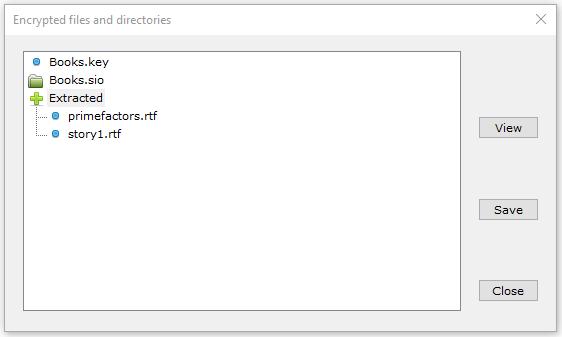
Any content represented in the listings below are held in a location which is completely scrubbed when no longer accessed. This is why if they are to be used later, they must be saved to a user accessible location.
Clicking the website icon will display the attached site in a new browser tab. Numerous feed back features allow communicating via forms and other mechanisms with the author. (The author can reassign the destination of the responses to other sites.)


A hosted item is identified by a VU number. In exchange for the VU#, the controller will return the URL / directory / filename / password, enabling an agent to retrieve the item if the requester has the right. If the user does not click on the VU title in the displayed tree, the agent does not contact the controller and hence not get the item.
If it is double clicked, the item is retrieved, given a timestamp ID, and stored locally(not in a DB). This is what happens when the “test upload345ert._sio” below is double clicked. The Retrieved line indicates the operation has completed. (And signaling not to retrieve again.)

At this point the item is stored on the agent(RAM) because it is necessary to get to the decrypted content. When this window is closed the item is shredded from the agent; i.e. it is only in temporary store. If the user revisits the mail with the hosting reference at a later time, he will get the latest copy of the item.
If one wants a copy, simply follow the directions above for saving files.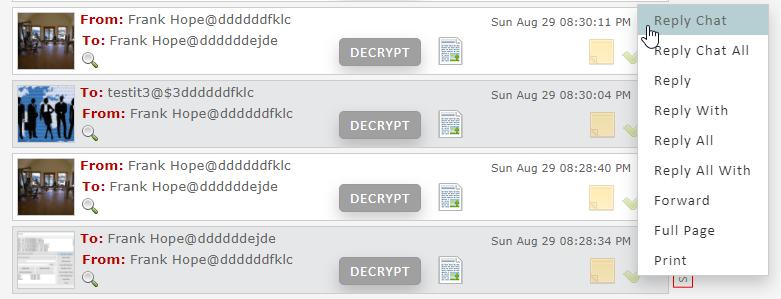
| Entry | Operation |
|---|---|
| Reply Chat | This brings up the Chat dialog with the address of the sender inserted into the TO: line. |
| Reply Chat All | This brings up the Chat dialog with the address of the sender plus anyone else who received this message inserted into the TO: line. |
| Reply | This brings up the Mail dialog with the address of the sender inserted into the TO: line. |
| Reply With | This brings up the Mail dialog with the address of the sender inserted into the TO: line, plus a decrypted copy of the content of the message being replied to. |
| Reply All | This brings up the Mail dialog with the address of the sender inserted into the TO: line, plus a copy of the CC: line. |
| Reply All With | This brings up the Mail dialog with the address of the sender inserted into the TO: line, plus a copy of the CC: line, as well as a decrypted copy of the content of the message being replied to. |
| Forward | Decrypt and copy the content of the message being replied to into the message portion of the mail. |
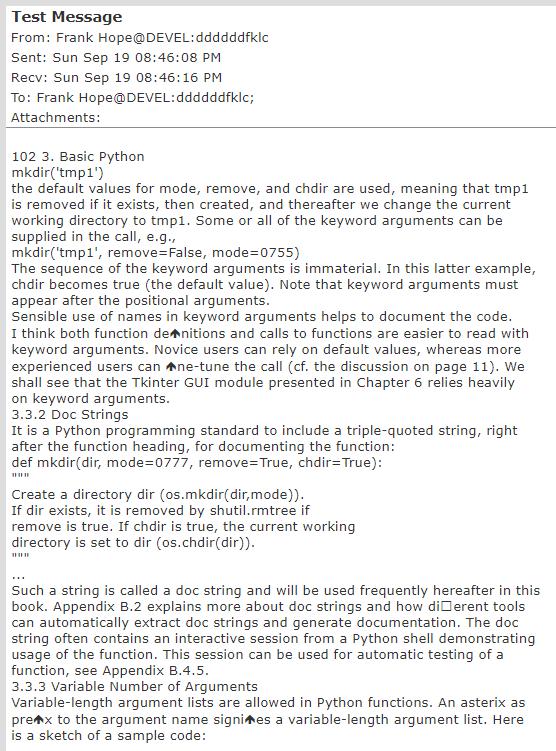
| Full Page | Decrypt and show the contents of the message in an expanded display. (Display includes time it was sent, time it was received, all those who received it, and a list of all attachments.) |
| Add User | Consumer Variant: Add this user to Rolodex of contacts. |
| Block User | Consumer Variant: Block this user. |
| Vocalize | Consumer Variant: Vocalize the decrypted contents of this message. |
| Print the decrypted contents of the message. |
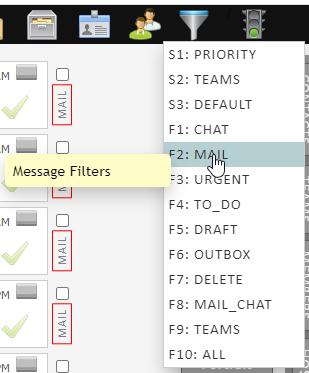
The gray items are sources of messages. The blue are filter flags. As an example, F7 (DELETE) says list all Mail and Chat messages that have the delete flag set.
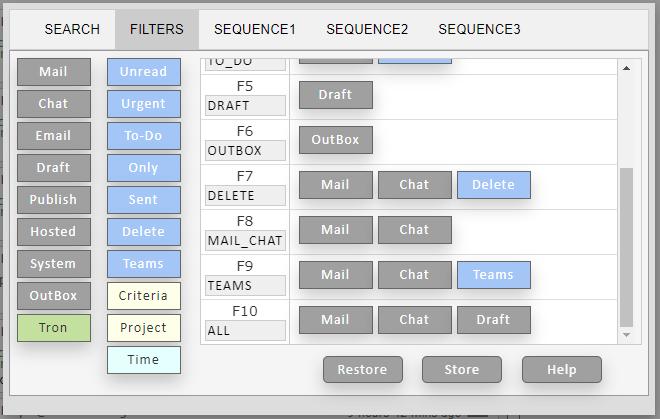
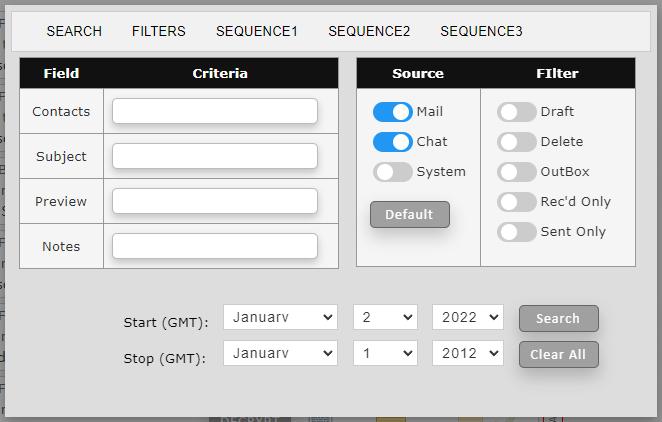
Sequences permit assembling listings out of various filter specifications. (It only list a messages once even if the filter specs it at multiple stages; i.e. first filter has the highest priority.)
This drop-down provides a short cut to the most frequently used filters. (Filter specifications and filter titles are user programmable.)
Click the mag glass icon on the subject line and a list of all messages with matching subjects will be shown. (The subject search is looking for a 100% match of the subject line, whereas the broad filter search above will accept partial case insensitive matches of words or expressions.)

Click the mag glass icon on the FROM line (only on Chat messages) and a list of all messages with matching accounts will be shown. When searching it looks to match group conversation. In other words, if the are three members in a conversation, it will seek out messages, sent and received, with those three and only those three.

Accounts can be assembled into a team that is owned by the originator. Teams allow sending a message to one account and having it distributed across many accounts. It also permits selectively listing together all messages associated with the particular conversation or project.
Accounts can be added to or removed from a team, but only by the team originator (owner). The team can also be renamed, deleted, or have a team profile attached to it. Again, only by the owner of the team.
When a message is sent to a team, the controller handles validation and the distribution to other members.
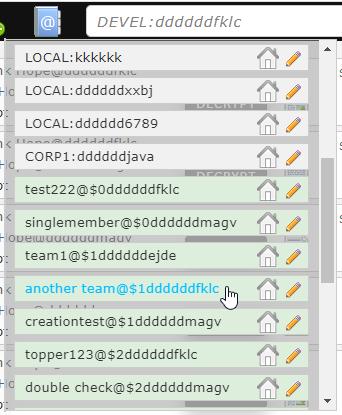
 |
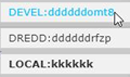
Passing over the address book located on the toolbar will cause your list of accounts to drop down for selection. |
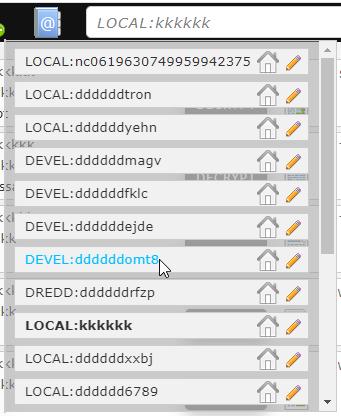
Sending a message to a team account will cause the controller to distribute the message to all members of the team. (The agent sends only a single copy to the controller and it is the controller who validates every party in the transaction.)
| Operation | Description |
|---|---|
 Select Account |
Selecting an account.
|
Retrieve Profile |
Download and display profile associated with this account in a separate browser tab.
|
 Edit Profile |
|
Not currently available. Deactivate Account |
Remove account.
Password confirmation is required with this operation. 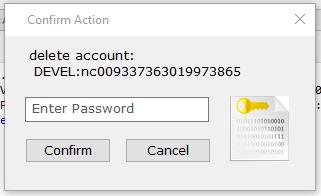
|
Unlike typical messaging systems, Visral does not send a low quality image of the sender with every message. Rather, account portraits are maintained on on a transfer server. When a message is received, the local portrait cache is check to see if there is already an up to date copy. If not, it will pull a fresh copy from the server. (A portrait date accompanies the message to facilitate always presenting the most current image. If a portrait is changed, all previous messages from the same author will display the most recent image after receiving one with the new picture.)
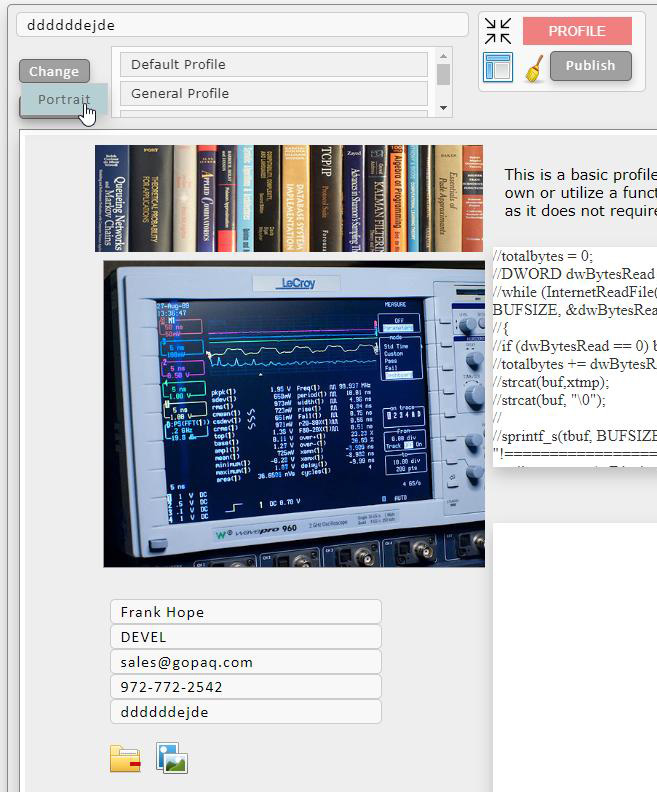
Clicking on a portrait will display it in an enlarged format, allowing for the presentation of significantly more informtion.
...


Profiles can be pulled by several different means. The location and key of profiles are kept in the controller DB. It is the controller who decides whether or not a requester can receive the profile. As an example; only members of a team can access team profiles. ...
Clicking on the From line of a message will display the profile of the author in a separate browser tab.

The profile menu can be entered by clicking on the specific pencil within the account menu.
Doing so will expose the profile menu containing the profile of the selected account. If the account is different from the current, accounts will be switched.
LockBoxes can hold messages, files, directories, images, and websites. They can be stored locally and/or remotely, and moved or copied to folders. Within reason, they are unlimited and can be associated with communities and accounts.
They are given a user created title as well as a system generated reference number. As with messages, they can be dragged and dropped into folders.

LockBox allows storing and retrieving from a remote location. Because of the encryption process the content can only be accessed via Visral.


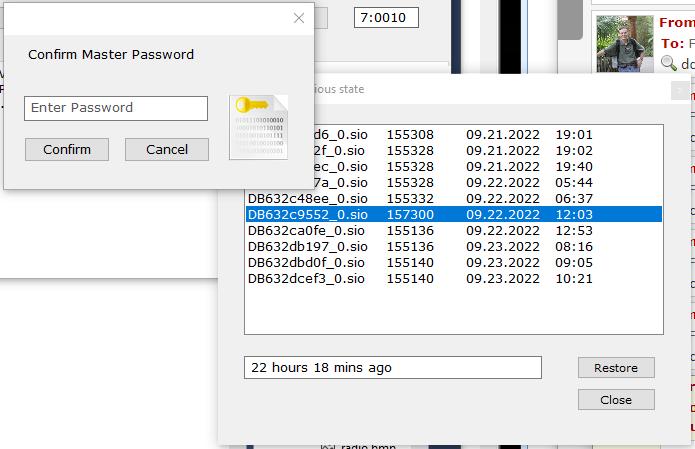
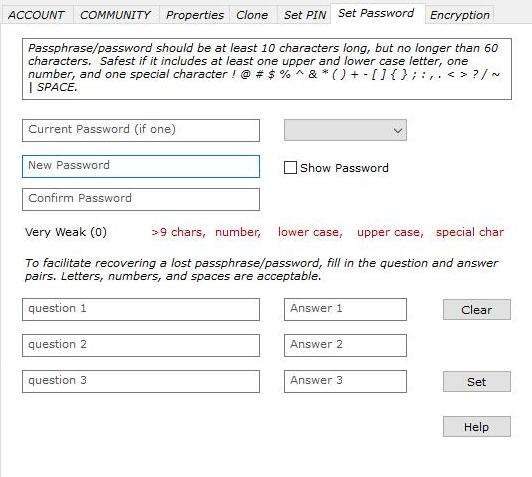
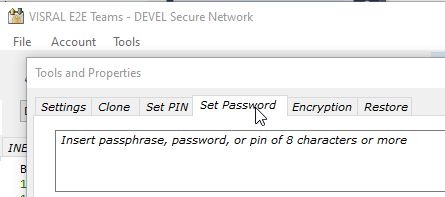
| To change the password, click the Set Password tab on the Tools dropdown, located in the Control Panel.
Dynamic assistance will be displayed to help in choosing a safe password. It will warn you if selecting a weak password, but will not prevent you from using it. It is pretty much overkill as this password never leaves the agent. The password created is used to unlock 256 bit randomly generated passwords that in turn are used to sign into accounts. In fact the Master Password utilizes the bcrypt algorithm to protect it from attempted access by malware that winds-up on the local machine. (click image to enlarge.) |

|
| The password and the Q&A entry can be changed by selecting the Set Password tab in the Properties menu. (Q&A will need to be reentered.) |

|
| Operation | Display |
|---|---|
| Text | All sent and received messages associated with the account. |
 |
Unread messages associated with the account. |
 |
Received messages associated with the account. |
Folders access can be found to the right side of the dashboard backplane. Up to 255 folders can be supported.
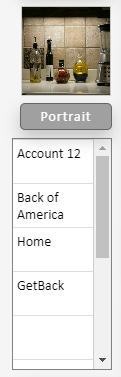
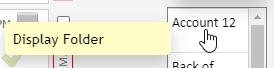
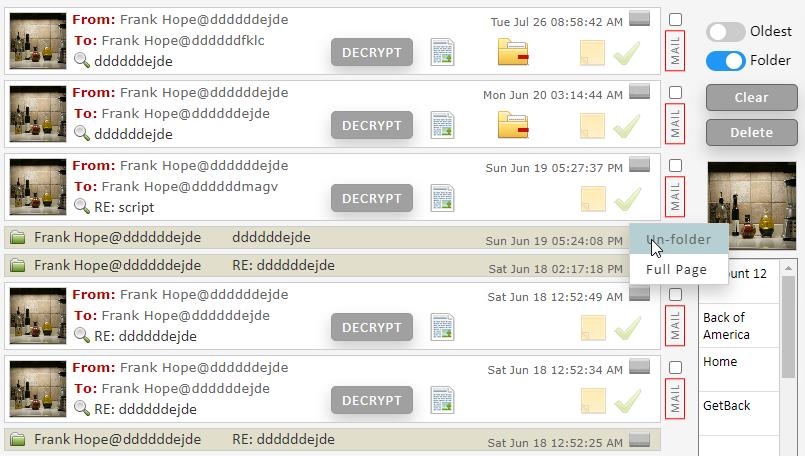
Folders messages are displayed by simply clicking on the folder of interest.
Messages, including hosted and lockboxes, are moved to a folder by drag and drop. The same message can be included in up to three different folders at the same time. This allows for more flexible sorting and recovery.
Files may also be dragged and dropped into folders. They will be encrypted along with all other information when logged out. The messages reflecting them have a unique appearance when the folder is displayed, and can be retrieved at that time.
Folders are named by right clicking on the particular one of interest.
The folder slider allows displaying messages previously move to folders, to be indicated in the source listing. A message can be moved to and reside in more than one folder at the same time.
Clicking the Advanced button of the context menu will bring up folder options such as automated forwarding and author/message validation; i.e. the author actually sent the particular message.
LockBoxes can hold messages, files, directories, images, and websites. They can be stored locally and/or remotely, and moved or copied to folders. Within reason, they are unlimited and can be associated with communities and accounts.
They are given a user created title as well as a system generated reference number. As with messages, they can be dragged and dropped into folders.
| Icon | Operation |
|---|---|
 |
Send an invite. Clicking it will display a menu where the invitee's information can be entered. |
|
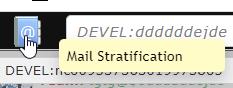
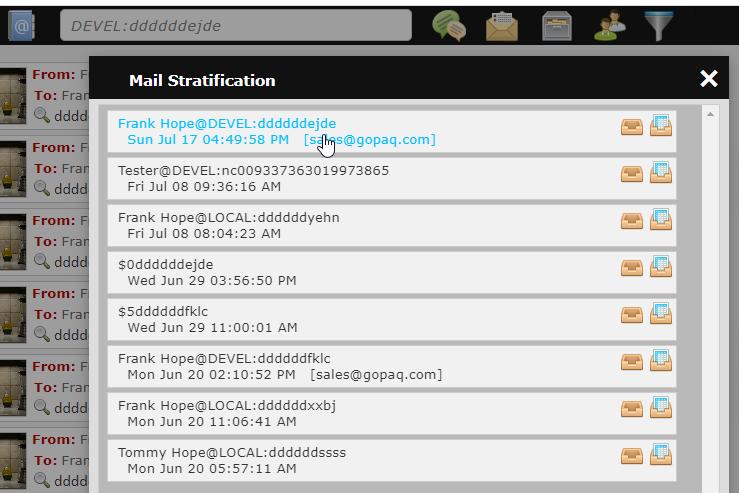
Passing over this icon will display a dropdown containing all the user's account. Clicking on an account from the listing will change to that account. Clicking on this icon will bring up Mail Stratification highlighting the most recent and frequent messages. |
 |
pressing over this icon will trigger a global search against the entries in the search bar. |
| Pressing this icon will bring up the chat dialog menu. If the menu is already up it will close it. | |
|
Pressing this icon will bring up the mail dialog menu. If the menu is already up it will close it. |
|
Pressing this icon will display the hosting dialog. This permits hosting data the can be accesses remotely, thus allowing authors update content of previously sent mail. |
 |
Pressing this icon will display the LockBox dialog. LockBoxes can hold files, directories, images, and websites. An unlimited number (within reason) can be created and stored locally and/or remotely. |
 |
Pressing this icon will display the team create/edit/delete facilities. |
 |
Pressing this icon will display the search/filter facilities. |
 |
This icon provides an indication of network status.
|